I used the STE oil recommended by Puget. I live in Texas and had a trip to San Antonio, so it was no big deal to pick it up in San Marcos. They are great people.
I actually paid the same price per gallon that I would have been able to get at a feed store. Vets were no help at all. I even tried several medical supply companies, including medical supply reps. There's no avoiding the cost.
It took just over 9 gallons to fill the tank and radiator. I would think you could easily get away with 10 gallons.
My computer already runs pretty cool, and I haven't overclocked at all, but they say you have to leave an inch for thermal expansion of the oil (fill up to an inch of the bottom of the black rim) . I didn't do this. This morning after cooling all night, the was no noticeable change in the level. I ran it hard last night and the oil was up to 28 C. They also say you don't want it to touch the black rim for fear that it will wick oil out... Mine is touching and it hasn't wicked out yet... I feel like I'm tempting fate, but I'm keeping a very close eye on it.
Sunday, September 9, 2012
Saturday, September 8, 2012
Up and Running
It's running and hovering at about 27.5 C, so I'm happy.
The tank scratches VERY easily, but scratches on the inside are filled by the oil, making them disappear. Unfortunately, the outside scratches just as easy and there is no solution. They are delivered dirty, and must be cleaned. Even using an all cotton baby cloth with purified water there's swirling. Once scratched on the outside, it's toast.
I tracked the problem down to the material used by the makers of the tank. In tanks there are three main materials:
1) Plexiglass or Acrylic - Expensive, very good material, hard to scratch, but brittle
2) Polycarbonate - Cheaper, less likely to break, but easier to scratch
3) Polystyrene - The cheapest material, thin, easy to use in manufacturing, scratches like crazy.
So what is the eclipse tank made of? You guessed it, polystyrene. Thankfully, Puget has amazing customer service. They use this tank because their choices are limited. There can be no silicone seams, because they say the oil will leak through it. So they found this seamless tank to be their best option for the moment. To be fair, while completing the project took much longer and dealing with the scratching issue has been a huge pain, I'm still pleased with the final result.
I tested the tank for leaks first, then installed the bubble stones/tubes, cleaned/placed the rocks, submerged the system and booted right up.
Wednesday, August 29, 2012
Finished the Radiator and Hood Buttons
The radiator is good-to-go and I'm fairly pleased with how it turned out. As planned the fans are controlled (3 at a time in 3 rows) by a 3 channel controller that can handle 30 watts per channel. The on/off lights are visible from the front and left side, and the knobs/buttons are easy to control. I wish there was a better way to hide the controller, but a 5.25 bay is too big and they don't make a small, finished-looking 3.5 enclosure.
The buttons were difficult because one of them didn't come with a wiring diagram. I think I have it wired correctly. They both work. I'm sure of the wiring for the power button, but the reset button didn't work until I switched some wires. Power button is illuminated at all times with an amber LED to match the temp sensors. The reset button's LED flashes with the drives to show activity. The LED in the reset button doesn't glow as bright. I think the power leads were connected wrong, damaging the LED. I wasn't sure which was + and which was -... Still don't... But they work...
The buttons were difficult because one of them didn't come with a wiring diagram. I think I have it wired correctly. They both work. I'm sure of the wiring for the power button, but the reset button didn't work until I switched some wires. Power button is illuminated at all times with an amber LED to match the temp sensors. The reset button's LED flashes with the drives to show activity. The LED in the reset button doesn't glow as bright. I think the power leads were connected wrong, damaging the LED. I wasn't sure which was + and which was -... Still don't... But they work...
Tuesday, August 28, 2012
Avoid Scratching The Acylic
ORIGINALLY I POSTED THE BELOW, BUT I DON'T RECOMMEND THIS IN THE PUGET TANKS. IT WILL WORK FOR SCUFFS AND SCRATCHES THAT BUG YOU, BUT IT MAY BE BETTER TO BUY A NEW TANK AS IT LEAVES SMALL SWIRL MARKS AND CLOUDS THE PLASTIC. IT IS A GREAT IDEA TO REFURBISH A BACKUP TANK. IF THE TANK MAKER WOULD USE ACRYLIC, THIS WOULD LIKELY WORK
Building this thing and getting everything just how I wanted it has created a lot of smudges. Being that my original tank couldn't even arrive without a scratch left me VERY paranoid about making any attempt to clean this thing.
Looking into the care of acrylic tanks, I've found some warnings and suggestions:
1) Use Mr. Clean's Magic Eraser to clean it. Apparently, it is chemical free and acts like 3000 grit sandpaper. Click here to check out what folks in the aquarium world have said about this. Obviously, you don't want to trap more abrasive objects in the Magic Eraser that could do damage. They also recommend that you wet it with water. I'm not really sure how this works yet, but I will report back.
2) Don't use cleaning products that contain alcohol or ammonia. No further explanation was given. So what do you use? Just water? This would have to leave smudges and streaks...
I will report back.
Saturday, August 25, 2012
Please follow the blog
I hope this has been helpful to you in some way. While I'm not sure how google works, I'm pretty sure it would help move this blog up in search queries if there were some people following it.
So, if you want to make this blog more available to folks searching via google, yahoo, etc. please follow the blog.
Thanks!
So, if you want to make this blog more available to folks searching via google, yahoo, etc. please follow the blog.
Thanks!
Friday, August 24, 2012
Need the tank, a few more cables and I'm ready
Not sure about having the SSD's in the oil... Going to research it, but I've got everything else just about how I wanted it.
Wednesday, August 22, 2012
Progress
Did some wiring today. There seems to be plenty of room (maybe a little too much) in the front of the tank, but there is very little space, even for wires, behind the tank. An inch back there would make clean wiring a snap.

It would also be amazing if there was a hole just beneath the power supply on the motherboard tray an also just behind the power supply on the top, so power chords could be hidden en route to devices kept out of the oil.
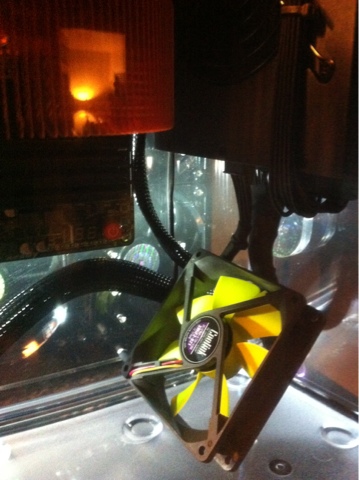

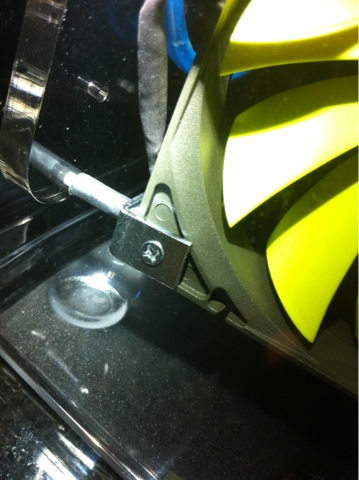
I also had to engineer a way to mount fans. I wish There were some threaded holes on the side brackets, 120 and 80 mm apart for fan mounting. I'm sure there is a better solution than the one I came up with.

Another little mod I did was the addition of a copper oil return that pulls the oil from the top, over the CPU.


Overall, I'm still very please. I need to know how to safely clean all the smudges off the system tray, for fear that I might damage some circuitry or the acrylic.
It would also be amazing if there was a hole just beneath the power supply on the motherboard tray an also just behind the power supply on the top, so power chords could be hidden en route to devices kept out of the oil.
I also had to engineer a way to mount fans. I wish There were some threaded holes on the side brackets, 120 and 80 mm apart for fan mounting. I'm sure there is a better solution than the one I came up with.
Another little mod I did was the addition of a copper oil return that pulls the oil from the top, over the CPU.
Overall, I'm still very please. I need to know how to safely clean all the smudges off the system tray, for fear that I might damage some circuitry or the acrylic.
Subscribe to:
Posts (Atom)